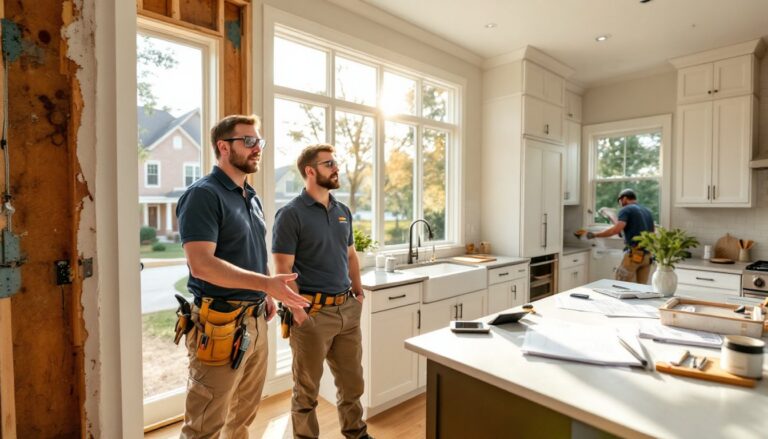
A cluttered mess of AV gear, tangled cables, and devices perched on mismatched furniture isn’t anyone’s idea of the perfect viewing experience. A purpose-built home theater cabinet solves these problems by organizing equipment, concealing wires, and providing proper ventilation, all while anchoring the room’s design. Whether upgrading a living room or finishing a basement theater, choosing and installing the right cabinet makes the difference between a functional entertainment setup and a daily frustration. This guide walks through cabinet types, essential features, installation steps, and the technical details that keep equipment safe and accessible.
Table of Contents
ToggleKey Takeaways
- A home theater cabinet organizes equipment, conceals cables, and provides ventilation—essential for protecting thousands of dollars in electronics and extending their lifespan.
- Choose the right cabinet type based on space and needs: TV stands suit small screens, media consoles offer flexible storage, and wall-mounted units deliver a sleek, space-saving aesthetic.
- Prioritize weight capacity, adjustable shelving, ventilation cutouts, and cable management features—these critical qualities determine whether your cabinet functions reliably for years or becomes a frustrating liability.
- Wall-mounted installation requires locating studs and using 3-inch lag screws into solid framing; freestanding units need proper leveling and optional tip-over straps for safety with children.
- Label all cables and use velcro straps instead of zip ties to simplify future upgrades and troubleshooting without damaging equipment.
- Monitor temperatures regularly and leave 2-3 inches of clearance above heat-generating devices like receivers and gaming consoles to prevent throttling and premature failure.
What Is a Home Theater Cabinet and Why You Need One
A home theater cabinet (also called an entertainment center or media console) is furniture designed specifically to house televisions, AV receivers, gaming consoles, Blu-ray players, streaming devices, and related equipment in one organized unit. Unlike generic shelving, these cabinets incorporate features like cable management channels, adjustable shelving, ventilated backs, and reinforced tops rated for TV weight.
The primary job of a theater cabinet is threefold: structural support for heavy displays, organization of multiple components, and heat dissipation to prevent equipment damage. Modern AV receivers and gaming consoles generate significant heat, consoles can reach internal temps above 150°F during operation. Without adequate airflow, devices throttle performance or fail prematurely.
Beyond function, a well-chosen cabinet hides the visual chaos of equipment and cabling. Open shelving might work for minimalists with one or two devices, but most home theaters involve a tangle of HDMI cables, power strips, optical audio lines, and ethernet connections. A cabinet with enclosed backs and wire routing grommets keeps all that complexity out of sight while maintaining access for changes and troubleshooting.
Anyone with more than two AV components, wall-mounted TVs that need equipment storage below, or basement theaters with dedicated seating will benefit from a proper cabinet. It’s not just cosmetic, it’s about protecting thousands of dollars in electronics and making the setup usable long-term.
Types of Home Theater Cabinets for Every Space and Style
Cabinets fall into several categories based on configuration, size, and mounting method. Choosing the right type depends on room layout, TV size, and how much gear needs storage.
TV stands are low-profile units (typically 18-24 inches tall) designed to support a TV on top. They work well for screens up to 65 inches and include one or two shelves for components. These suit renters or anyone avoiding wall mounting. Look for models with a weight capacity of at least 150 pounds if placing large OLED or older plasma screens.
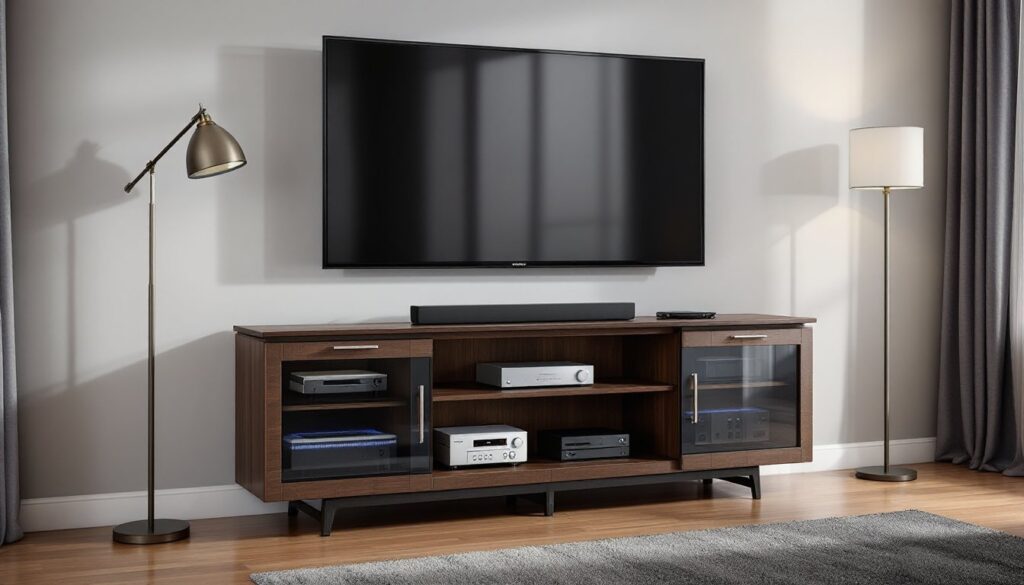
Media consoles are longer, often 60-80 inches wide, with multiple open or closed compartments. They offer more storage than basic stands and can accommodate soundbars, center channel speakers, and decorative items. Many have tempered glass doors with IR-friendly glass that lets remote signals pass through, so devices can stay hidden.
Wall units or entertainment walls combine a TV mount with surrounding shelving and cabinets, creating a built-in look. These require more installation effort, expect to locate wall studs, use lag bolts, and possibly install blocking between studs for maximum load distribution. Wall units work best in dedicated theater rooms where aesthetics and equipment volume justify the effort.
Corner cabinets maximize awkward spaces and suit smaller rooms. They’re typically triangular or angled, fitting snugly into 90-degree corners. Component space is limited, so they’re best for minimal setups (TV, soundbar, one streaming box).
Wall-Mounted vs. Freestanding Entertainment Centers
Freestanding cabinets sit on the floor and require no structural attachment. They’re renter-friendly, easy to move, and don’t demand precise stud location. The tradeoff: they take up floor space and may not suit ultra-modern aesthetics. Stability depends on a level floor, shim legs if needed to prevent rocking.
Wall-mounted units (or floating consoles) attach directly to wall studs using heavy-duty brackets or French cleats. They free up floor space, simplify cleaning underneath, and deliver a sleek, contemporary look. Installation demands accuracy: locate studs with a stud finder, drill pilot holes, and use 3-inch lag screws into solid framing. Most wall-mounted cabinets are rated for 100-200 pounds, but always verify the rating and wall structure. Drywall anchors alone won’t support the combined weight of a cabinet and equipment, hit studs or install solid blocking. For projects requiring more advanced custom cabinetry, resources like beginner woodworking guides can help develop the skills needed to build or modify units.
Choosing between them often comes down to whether the space allows for drilling and whether the user prioritizes flexibility (freestanding) or minimalism (wall-mounted).
Key Features to Look for When Choosing Your Cabinet
Not all cabinets are built equally. Focus on these features to ensure the unit meets functional and longevity standards.
Weight capacity: Check both the top surface (for the TV) and shelves (for receivers, consoles, etc.). A 55-inch TV and stand weigh 35-50 pounds: a 75-inch can exceed 80 pounds. Add a receiver (15-25 lbs), gaming consoles, and other gear, total load often reaches 150+ pounds. If the manufacturer doesn’t publish capacity ratings, move on.
Adjustable shelving: Fixed shelves limit flexibility as equipment changes. Look for units with adjustable shelf pins or tracks, allowing vertical spacing to accommodate tall components like tower speakers or stacked AV gear.
Ventilation: Enclosed cabinets need cutouts, mesh panels, or slatted backs to allow heat escape. The Consumer Electronics Association recommends at least 2-3 inches of clearance above heat-generating devices. Some cabinets include built-in fans, but passive airflow is usually sufficient if the back is open or perforated.
Cable management: Grommets, channels, or cable raceways keep wires organized and accessible. Rear access panels or removable backs simplify adding or swapping cables without moving the entire unit. This feature is critical for anyone who upgrades equipment regularly.
Door styles: Solid wood doors block heat and remote signals. Tempered glass or mesh doors solve both problems, though glass can add glare. Some prefer open shelving for maximum airflow and zero signal interference, accepting the visible clutter.
Material and build quality: MDF (medium-density fiberboard) and particleboard are affordable but less durable and prone to sagging under sustained weight. Solid wood or plywood construction with hardwood veneer costs more but lasts decades and handles heavy loads without warping. Check corner joints, dado joints or mortise-and-tenon are stronger than simple butt joints with screws.
Consider viewing several top-rated media consoles to compare these features across different models and price points.
How to Install a Home Theater Cabinet: Step-by-Step DIY Guide
Installing a freestanding cabinet is straightforward, but wall-mounted units require careful planning and execution. Both need proper prep and safety steps.
Tools and materials:
- Stud finder
- Level (24-inch or longer)
- Drill/driver with bits
- 3-inch lag screws (for wall-mounted units)
- Shims (for leveling)
- Pencil
- Tape measure
- Safety glasses
For freestanding cabinets:
- Clear and measure the space. Ensure adequate clearance for doors, drawers, and ventilation. Leave at least 2 inches between the cabinet back and the wall for airflow and cable routing.
- Check floor level. Use a level across the installation area. If the floor slopes, note where shims will be needed.
- Position the cabinet. With help (these units often weigh 100+ pounds), slide the cabinet into place. Avoid dragging on hardwood or tile, lift or use furniture sliders.
- Level the unit. Place a level on top, front-to-back and side-to-side. Insert shims under legs as needed. An unlevel cabinet causes doors to swing open or fail to close properly.
- Anchor to the wall (recommended). Even freestanding units should be secured to prevent tip-over, especially in homes with children. Use a furniture anchor strap screwed into a wall stud and attached to the cabinet’s rear upper frame.
- Install shelves and hardware. Insert adjustable shelf pins at desired heights. Attach any included cable management clips or grommets.
For wall-mounted cabinets:
- Locate studs. Use a stud finder to mark stud centers along the intended mounting height. Standard stud spacing is 16 or 24 inches on center. Mark both studs that the cabinet will span.
- Mark mounting height. Measure up from the floor to the desired cabinet position (commonly 12-18 inches for a floating console). Use a level to draw a light pencil line across the studs.
- Attach the mounting bracket or cleat. Most wall-mounted cabinets use a French cleat (a 45-degree angled board) or heavy-duty brackets. Drill pilot holes into studs, then drive 3-inch lag screws through the bracket into solid wood. Check level after each screw.
- Hang the cabinet. With a helper, lift the cabinet and hook it onto the wall bracket. Confirm it’s seated fully and level.
- Secure the cabinet. Some designs include additional screws through the cabinet’s rear into studs for extra stability. Install these per manufacturer instructions.
- Install shelves and route cables. With the cabinet mounted, add interior shelves and begin cable organization.
Safety notes: Always wear safety glasses when drilling overhead. Wall-mounted cabinets require two people, never attempt to hang one solo. If unsure about wall structure (metal studs, plaster and lath, or unknown blocking), consult a structural engineer or contractor. The consequences of a failed mount include injury and thousands in damaged equipment.
Cable Management and Ventilation Best Practices
Even a perfectly installed cabinet becomes a problem if cables are a tangled mess or equipment overheats. These practices keep the system reliable and serviceable.
Cable management:
- Label everything. Use a label maker or masking tape and a marker to tag both ends of each cable (e.g., “TV HDMI 1,” “Receiver Out”). This saves hours during troubleshooting or upgrades.
- Use velcro straps, not zip ties. Velcro is reusable and doesn’t require cutting when changes are needed. Zip ties can also pinch or damage cable insulation if overtightened.
- Route power separately from signal cables when possible. Running HDMI or audio cables parallel to AC power cords for long distances can introduce interference or hum.
- Plan for future changes. Leave 12-18 inches of slack on each cable and route everything through the cabinet’s grommets or channels. Tight, custom-length cables look clean initially but become a nightmare when adding a new device.
- Consider in-wall routing for wall-mounted TVs. If the cabinet is below a wall-mounted screen, an in-wall rated cable kit (meeting NEC standards) hides cables inside the wall between the TV and cabinet. This requires cutting two holes (one behind the TV, one behind the cabinet) and fishing cables through the cavity. It’s not structural work, but it’s more involved than surface routing. Some jurisdictions require a permit for in-wall electrical work.
Ventilation:
- Measure clearances. Leave at least 2-3 inches above AV receivers and gaming consoles. Side clearances of 1-2 inches are sufficient if the rear is open.
- Monitor temperatures. In the first few weeks, check the top of enclosed equipment after extended use (e.g., a 3-hour movie or gaming session). If surfaces are too hot to touch comfortably (above ~120°F), improve airflow.
- Add aftermarket fans if needed. Small USB-powered cabinet fans (80-120mm) can be mounted inside enclosed units. Position them to exhaust hot air out the rear or top. Fans should be nearly silent, cheap models create annoying hum.
- Avoid stacking heat sources. Don’t place a cable box directly on top of an AV receiver. Use separate shelves or add a ventilated shelf riser between them.
- Consider open-back designs for high-heat setups. If running a high-end gaming PC, multiple consoles, and a powerful receiver, an enclosed back may never provide adequate cooling. Many current media console models balance style with practical ventilation needs.
Proper cable and ventilation management isn’t glamorous, but it’s what separates a cabinet that works flawlessly for a decade from one that becomes an expensive headache within a year.
Conclusion
A well-chosen and properly installed home theater cabinet transforms a tangle of electronics into a clean, functional entertainment hub. Focusing on load capacity, ventilation, cable management, and correct mounting techniques ensures the setup lasts through multiple equipment upgrades. Whether building from scratch or selecting a ready-made unit, attention to these details prevents the most common failures and keeps the home theater running smoothly for years.