Walk into any home center and you’ll face a wall of circular saw blades, dozens of options with different tooth counts, coatings, and cryptic labels. Grab the wrong one and you’ll burn through material, splinter edges, or bog down your saw mid-cut. The right blade, though, makes even a budget circular saw feel like a precision tool. This guide breaks down exactly what those specs mean, which blades handle which jobs, and how to match a blade to your project without wasting money on features you don’t need.
Table of Contents
ToggleKey Takeaways
- Circular saw blades vary in tooth count (16–80+ teeth), with fewer teeth cutting faster but rougher, and more teeth producing smoother finishes ideal for visible cuts.
- Blade diameter determines maximum cutting depth—the common 7-1/4″ blade cuts roughly 2-3/8″ deep, while larger 10–12″ blades are standard for miter and table saws requiring deeper cuts.
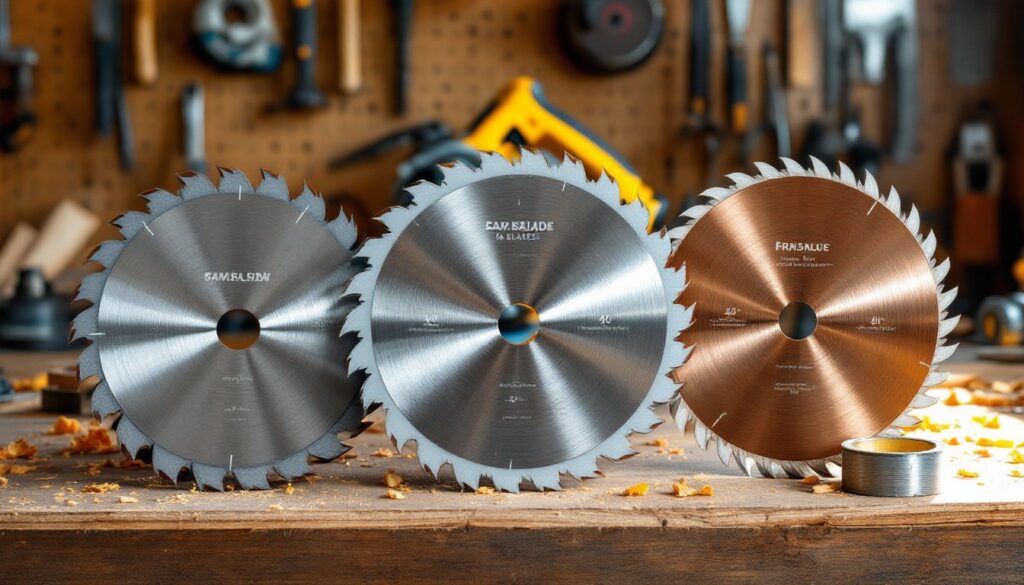
- Carbide-tipped circular saw blades stay sharp 10–50 times longer than steel blades and outperform them significantly in longevity and cut quality across most materials.
- Match tooth geometry to your task: flat-top teeth rip along the grain, alternate top bevel (ATB) teeth slice cleanly across the grain, and triple-chip grind handles abrasive materials like laminate.
- For most DIYers, a quality carbide-tipped combination blade with 40–50 teeth handles both ripping and crosscutting adequately, eliminating the need to swap blades between different projects.
- Always verify your saw’s arbor size (typically 5/8″ for full-size saws) and never install an oversized blade, as it risks binding, overheating, or contacting the guard.
Understanding Circular Saw Blade Anatomy and Components
Every circular saw blade has the same basic structure, but the details determine how it cuts. The blade body (or plate) is the flat metal disc that spins. Thinner plates produce narrower kerfs, the width of the cut, which means less wasted material and less motor strain. Most standard blades have a kerf between 1/16″ and 1/8″.
The teeth are the cutting edges around the perimeter. They’re either stamped from the same steel as the body or tipped with carbide, a much harder material that stays sharp 10–20 times longer. Carbide-tipped blades cost more upfront but pay off if you cut regularly.
Between the teeth are gullets, the curved spaces that carry sawdust out of the cut. Larger gullets clear chips faster, which matters when ripping thick lumber. The expansion slots (narrow cuts radiating from the arbor hole) allow the blade to expand slightly as it heats up, preventing warping.
Finally, the arbor hole in the center mounts the blade to your saw’s spindle. Standard sizes are 5/8″ for most handheld circular saws and table saws, though some smaller saws use a 1/2″ or diamond arbor. Always check your saw’s arbor size before buying.
Blade Diameter and Arbor Size: Getting the Right Fit
Blade diameter dictates maximum cutting depth. A 7-1/4″ blade (the most common size for handheld circular saws) cuts roughly 2-3/8″ deep at 90 degrees, enough to cut through a 2×4 (actual dimensions 1-1/2″ x 3-1/2″) in one pass. Smaller 6-1/2″ blades max out around 2-1/8″ depth and are common on compact or cordless saws. Larger 10″ and 12″ blades are standard on miter saws and table saws, where you need deeper cuts or wider crosscut capacity.
You can’t just swap in a bigger blade to gain depth. The saw’s motor, blade guard, and base plate are all sized for a specific diameter. Installing an oversized blade is dangerous, it can bind, overheat, or contact the guard. Check your saw’s manual or the label on the upper guard for the maximum rated blade diameter.
The arbor size must match your saw’s spindle exactly. Most full-size circular saws and table saws use a 5/8″ arbor. Compact saws and some European models may use 1/2″ or a diamond-shaped arbor. If the arbor hole is too large, the blade will wobble. If it’s too small, it won’t fit. Adapters (called bushings) can reduce arbor size, but never enlarge it. When in doubt, bring your old blade to the store to compare.
Tooth Count and Configuration: How They Affect Your Cut Quality
Tooth count is the single biggest factor in cut quality and cutting speed. Fewer teeth remove material faster but leave a rougher edge. More teeth produce smoother cuts but feed slower and generate more heat.
Low tooth count (16–24 teeth): These blades rip through material quickly. The large gullets between teeth clear chips efficiently, which prevents binding when cutting with the grain. Expect a rough edge that you’ll need to sand or plane if appearance matters.
Medium tooth count (40–50 teeth): This range balances speed and finish. It’s the sweet spot for general-purpose work, framing, deck building, rough carpentry. You’ll see these marketed as combination blades because they handle both ripping and crosscutting reasonably well.
High tooth count (60–80+ teeth): More teeth mean cleaner cuts, especially across the grain. The downside is slower feed rates and more friction, which can burn hardwoods or softer materials like melamine if you push too hard. These are your go-to for finish carpentry, plywood, and any cut that’ll be visible.
Tooth geometry also matters. Flat-top teeth (FT) chisel straight through, ideal for ripping. Alternate top bevel (ATB) teeth angle left and right, slicing fibers cleanly for crosscuts. Triple-chip grind (TCG) teeth combine a flat-top raker with beveled teeth, designed for abrasive materials like laminate or fiber cement. Some workshop tool setups prioritize having multiple dedicated blades for different cuts rather than relying on one combination blade.
Common Blade Types and Their Best Uses
Ripping Blades vs. Crosscut Blades
Ripping blades have 16–24 teeth with deep gullets and flat-top or alternate top bevel geometry. They’re designed to cut along the grain, where you’re removing large amounts of material quickly. Use these for breaking down sheet goods, cutting lumber to width, or any long cut parallel to the wood fibers. The low tooth count reduces heat buildup and binding, but the edge will be rough.
Crosscut blades carry 60–80 teeth with shallow gullets and alternate top bevel or high alternate top bevel (Hi-ATB) geometry. These slice across the grain, severing wood fibers cleanly to minimize tearout and splintering. They’re essential for trim work, cutting plywood or MDF to finished dimensions, or any cut that’ll be visible. Feed slower and let the teeth do the work, forcing it will burn the cut and dull the blade faster.
In practice, most DIYers don’t swap blades between rips and crosscuts. That’s where combination blades come in.
Combination Blades and Specialty Blades
Combination blades (often labeled “general purpose”) pack 40–50 teeth with a mix of tooth geometries. They rip reasonably fast and crosscut reasonably clean, not the best at either task, but good enough for most projects. If you’re only buying one blade, this is it. Look for a quality carbide-tipped combo blade with at least 40 teeth.
Specialty blades target specific materials:
-
Plywood/laminate blades: 80–100 teeth with a thin kerf and high ATB grind. They minimize chip-out on veneer and laminates. Essential if you’re building cabinets or working with finished panels.
-
Framing blades: 24 teeth, often with a thicker plate and aggressive hook angle for speed. Built for rough carpentry where finish doesn’t matter.
-
Non-ferrous metal blades: 60–90 teeth with a triple-chip grind and often a special coating. Cut aluminum, copper, and brass without gumming up the blade. Never use these on ferrous metals (steel, iron), you need an abrasive cutoff wheel for that.
-
Masonry/fiber cement blades: Polycrystalline diamond (PCD) or carbide teeth designed for abrasive materials like HardieBacker, brick pavers, or tile. Standard wood blades will dull almost instantly on these materials.
-
Dado sets: Not a single blade, but a stack of blades and chippers that cut grooves or rabbets in one pass. Common in table saw woodworking, but not compatible with most handheld circular saws.
If you’re working on a specialty material, the investment in a dedicated blade usually pays off in cleaner cuts and longer blade life.
Blade Materials: Carbide-Tipped, Steel, and Beyond
The material of the cutting teeth determines how long a blade stays sharp and what it can cut.
High-speed steel (HSS) blades are stamped from a single piece of steel, with the teeth formed directly from the body. They’re inexpensive and sharpen easily, but they dull quickly, especially on abrasive materials like treated lumber or composites. You might see these on very cheap blades or vintage saws. For most DIY work, they’re a false economy.
Carbide-tipped blades have small chunks of tungsten carbide brazed onto each tooth. Carbide is much harder than steel and holds an edge 10–50 times longer depending on the quality. The carbide tips can be resharpened by a professional sharpening service, extending blade life even further. Nearly all modern circular saw blades sold for DIY use are carbide-tipped. The quality of the carbide varies, premium blades use denser, more wear-resistant carbide and thicker tips that can be resharpened multiple times.
Polycrystalline diamond (PCD) tips take hardness even further. These are reserved for ultra-abrasive materials like fiber cement siding or engineered composites that would destroy carbide in minutes. PCD blades are expensive (often $100+) and can’t be resharpened, but they’ll outlast dozens of carbide blades in the right application.
The blade body material also varies. Higher-end blades use thicker, flatter plates with laser-cut expansion slots and vibration dampening. Some have anti-stick coatings (Teflon, PTFE) that reduce pitch buildup and friction. These features matter more for table saws and miter saws, where blade runout and vibration are easier to detect. On a handheld circular saw, a quality carbide-tipped blade from a reputable manufacturer (Freud, Diablo, DeWalt, Irwin) will handle most tasks without needing exotic materials.
One final note: always wear safety glasses and hearing protection when operating a circular saw. Carbide teeth can chip or break if they hit a nail or staple, sending fragments flying at high speed. Inspect blades before installing them, and retire any blade with missing or damaged teeth. A dull blade is safer to use than a damaged one, it just cuts slower. According to hands-on tool testing, carbide-tipped blades with proper tooth geometry outperform steel by significant margins in both longevity and cut quality across nearly all materials.