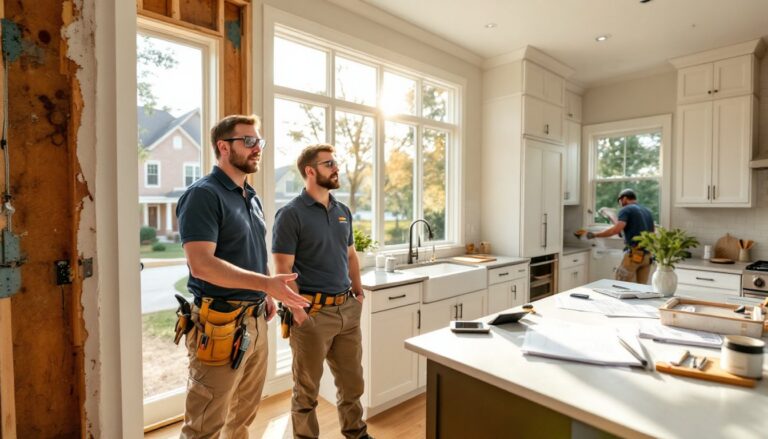
Living within reach of the Great Lakes delivers stunning views and access to unmatched natural beauty, but it also subjects homes to extreme weather swings, relentless humidity, and moisture-driven challenges that simply don’t exist in inland climates. Remodeling a lakeside property isn’t just about aesthetics or resale value: it’s about building resilience into every surface, joint, and finish. Homeowners who skip the specialized prep work or use materials not suited for high-humidity coastal environments often find themselves repeating projects within a few seasons. This guide walks through the remodeling considerations, project priorities, budgeting strategies, material choices, and permitting realities specific to Great Lakes communities.
Table of Contents
ToggleKey Takeaways
- Great Lakes home remodeling requires specialized moisture control, foundation waterproofing, and freeze-thaw resistant materials because lakeside climates subject homes to extreme humidity, 40+ freeze-thaw cycles per winter, and intense precipitation.
- Prioritize weatherproofing upgrades including attic insulation (R-49 to R-60), air sealing, roof underlayment with ice-and-water shield, and 6-inch gutters to prevent ice dams and water infiltration that cause costly damage within seasons.
- Select high-moisture materials like fiber cement siding, composite or capped PVC decking, triple-pane low-E windows, and stainless steel fasteners instead of standard inland products that fail prematurely in Great Lakes conditions.
- Budget $150–$250 per square foot for whole-home Great Lakes home remodeling projects, book exterior work May through October, and negotiate 10–15% discounts for interior projects scheduled during off-season winter months.
- Navigate stricter lakeside permits and regulations including 25–75 foot setbacks from water, state wetland protection laws, historic district design reviews, and blower door air-sealing tests required by updated energy codes.
- Plan projects at least six months in advance, secure 8–12 week lead times for windows and custom materials, and hire licensed contractors familiar with local building departments to streamline permits and reduce mid-project code violations.
Why Great Lakes Homes Require Specialized Remodeling Considerations
The Great Lakes region experiences a climate cocktail that accelerates wear on building materials: freeze-thaw cycles that can exceed 40 repetitions per winter, summer humidity regularly above 70%, and lake-effect precipitation that dumps snow and rain in concentrated bursts. This isn’t coastal saltwater erosion, but the moisture load is comparable.
Freeze-thaw damage cracks concrete foundations, lifts deck footings, and splits wood siding that hasn’t been properly sealed. Water infiltrates small gaps, freezes, expands, and widens the opening with each cycle. Foundation waterproofing and drainage systems aren’t optional add-ons, they’re baseline requirements.
Humidity and condensation drive mold growth, rot wood framing, and corrode fasteners. Homes near the water often lack adequate vapor barriers in walls and attics, leading to hidden damage inside wall cavities. Proper ventilation, dehumidification, and moisture-resistant materials should be part of any remodel that opens up walls or ceilings.
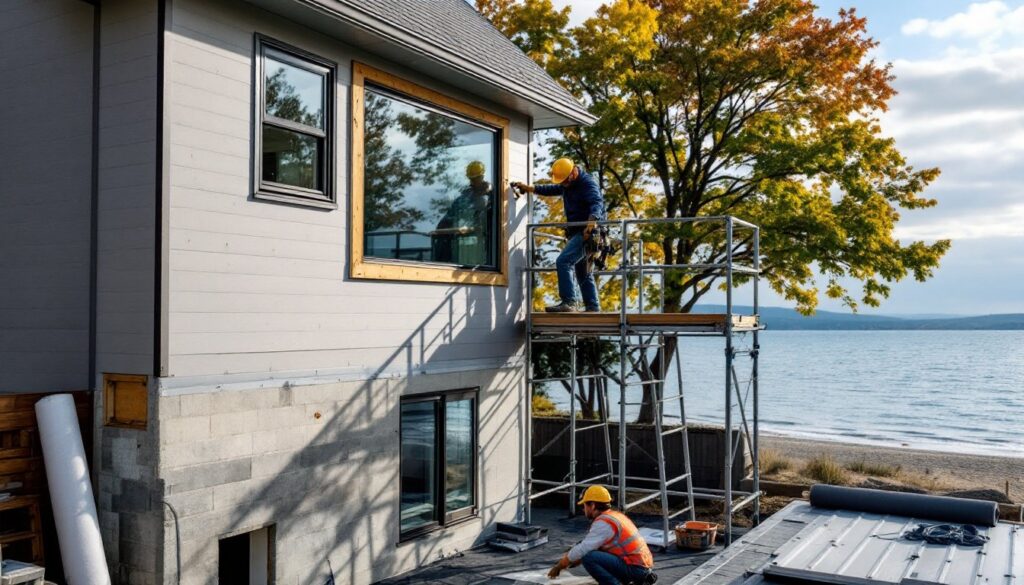
Wind exposure is another factor. Properties on bluff tops or open shoreline face sustained winds that test roof sheathing, siding attachment, and window seals. The International Residential Code (IRC) specifies wind load requirements, but local amendments in lakeside jurisdictions often increase fastener schedules and sheathing thickness. Check with your municipal building department before finalizing plans.
Finally, seasonal access and weather windows complicate project timelines. Exterior work is often limited to May through October, and contractor schedules fill early. Plan remodels at least six months ahead if you want to lock in quality crews during peak season.
Top Remodeling Projects for Great Lakes Homeowners
Weatherproofing and Moisture Control Upgrades
Air sealing and insulation top the priority list. Many older lakeside homes were built as seasonal cottages, with minimal insulation and air barriers designed for summer use only. Upgrading to R-49 to R-60 attic insulation and R-20+ wall insulation (using closed-cell spray foam or dense-pack cellulose) reduces heating costs and prevents condensation inside wall cavities.
Install a continuous air barrier using housewrap or fluid-applied membranes on exterior sheathing, and seal all penetrations, windows, doors, utilities, with appropriate flashing and caulk. The goal is to control where moisture moves, not eliminate it entirely.
Foundation waterproofing often requires exterior excavation to apply rubberized membrane and install perimeter drain tile connected to daylight drainage or a sump system. Interior french drains are a less invasive option but don’t address hydrostatic pressure pushing moisture through foundation walls.
For crawl spaces, encapsulate with 6-mil or thicker polyethylene vapor barrier, sealed at seams and terminations, plus a dehumidifier if ventilation is closed off. This approach, recommended by building scientists and detailed on professional renovation platforms, prevents ground moisture from migrating into floor framing.
Don’t overlook roof and gutter systems. Ice dams form when heat escaping through the roof melts snow, which refreezes at the eaves. Prevent this with proper attic insulation, ventilation (soffit-to-ridge airflow), and ice-and-water shield membrane underlayment extending at least 3 feet past the interior wall line. Upgrade to 6-inch gutters and 3×4-inch downspouts to handle lake-effect deluges.
Maximizing Natural Light and Lake Views
Window and door replacement is a high-impact remodel. Swap out old single- or double-pane units for triple-pane, low-E glass with argon or krypton fill. Look for U-factors below 0.25 and a DP (design pressure) rating of 40 or higher to handle wind exposure. Vinyl and fiberglass frames outperform wood in high-moisture environments, wood requires maintenance, and even clad units can trap moisture at joints.
Patio doors and lift-and-slide systems open up walls to maximize views. For wide spans, consider multi-slide or folding glass walls, but verify that your wall framing can support the header load, consult a structural engineer if the opening exceeds 12 feet or if you’re removing a load-bearing wall.
Skylights and solar tubes bring daylight into interior spaces without sacrificing privacy or wall space. Use curb-mounted skylights with integral flashing kits, not deck-mounted units, to reduce leak risk. In snowbelt areas, choose models rated for heavy snow loads.
Adding a second-story deck or balcony can capture elevated lake views. Decking should be composite or PVC, not wood, to resist moisture. Frame with pressure-treated or galvanized steel joists, and use stainless steel or hot-dipped galvanized fasteners, standard deck screws rust out quickly in humid climates.
Budgeting and Planning Your Great Lakes Remodeling Project
Remodeling costs in Great Lakes markets vary widely by location and season. As a rough baseline, expect $150–$250 per square foot for whole-home remodels, though kitchen and bathroom projects can spike to $300+ per square foot with high-end finishes.
Get multiple bids from licensed, insured contractors with local references. Ask for itemized estimates that break out labor, materials, permits, and contingency (typically 10–15% for unforeseen issues like rot or code upgrades).
Seasonal pricing matters. Contractors are hungrier for work in late fall and winter: you may negotiate 10–15% discounts for interior projects scheduled during the off-season. Exterior work booked in winter for spring start dates can also lock in better rates.
Factor in material lead times. Windows, doors, and custom cabinetry can take 8–12 weeks, longer if supply chains tighten. Order early and arrange secure on-site storage if delivery precedes installation.
For design inspiration and project scoping, platforms like Houzz showcase regional portfolios, which helps align expectations with budget realities.
Financing options include home equity lines of credit (HELOCs), cash-out refinances, and FHA 203(k) renovation loans. Each has trade-offs in interest rates, fees, and qualification requirements. Compare offers and understand the full cost of borrowing before committing.
Plan for temporary displacement if the remodel impacts kitchens or bathrooms. Budget $1,500–$3,000 for temporary housing or rental equipment during major phases.
Selecting the Right Materials for Lakeside Durability
Material selection makes or breaks lakeside remodels. Standard products used inland often fail prematurely in high-moisture, freeze-thaw environments.
Siding: Fiber cement (HardiePlank, James Hardie) and engineered wood (LP SmartSide) outperform vinyl in impact resistance and dimensional stability. Both require back-priming and proper flashing. Avoid standard wood lap siding unless you commit to repainting every 3–4 years. Metal (steel or aluminum) and stone veneer are low-maintenance alternatives but require experienced installers.
Decking: Composite (Trex, TimberTech) and capped PVC (Azek, Fiberon) resist moisture, mold, and UV degradation. Avoid first-generation composites, newer capped products have a protective polymer shell that prevents staining and splintering. For framing, use pressure-treated Southern Yellow Pine rated for ground contact (minimum 0.40 pcf retention) or consider aluminum or galvanized steel joists for maximum longevity.
Roofing: Asphalt shingles rated Class 4 impact-resistant with a 50-year warranty are standard for lakeside homes. Metal roofing (standing seam or corrugated steel) sheds snow and resists wind uplift, though upfront costs run $8–$15 per square foot installed vs. $4–$7 for asphalt. Ice-and-water shield underlayment is non-negotiable in snowbelt zones.
Windows and doors: Fiberglass or vinyl frames with welded corners and multi-point locking systems hold up best. Avoid wood unless you’re willing to maintain it. For coastal aesthetics, look for impact-rated or laminated glass that also improves energy performance.
Interior finishes: Use mold-resistant drywall (purple board or fiberglass-faced) in bathrooms, kitchens, and basements. Choose tile or luxury vinyl plank (LVP) flooring over hardwood in high-moisture areas, LVP handles humidity swings without cupping. If you install hardwood, acclimate it on-site for at least a week and maintain indoor humidity between 30–50% year-round.
Fasteners and hardware: Stainless steel (304 or 316 grade) or hot-dipped galvanized fasteners prevent rust. Standard zinc-plated screws and nails corrode quickly. This applies to joist hangers, deck screws, roofing nails, and trim fasteners.
Tutorials and product reviews on classic remodeling resources can help compare material performance in similar climates.
Navigating Permits and Regulations in Great Lakes Communities
Building permits aren’t optional, and lakeside jurisdictions often layer local ordinances on top of state codes. Expect permits for:
• Structural changes (removing walls, adding floors, altering roof framing)
• Electrical, plumbing, and HVAC work beyond minor repairs
• Additions and decks (any structure over 200 square feet typically requires a permit)
• Foundation work and grading that affects drainage or setbacks
Setback requirements are stricter near water. Many communities mandate 25–75 feet from the ordinary high water mark, and building within that zone may trigger environmental reviews or require variances. Check local zoning ordinances before designing additions or decks.
Shoreline regulations vary by state. Michigan, Wisconsin, Minnesota, and other Great Lakes states have wetland protection laws that restrict filling, dredging, or building within designated buffer zones. Contact your state’s Department of Natural Resources or Environmental Quality office early in planning.
Historic districts around the Great Lakes impose design review for exterior alterations. If your home is listed or located in a historic overlay, expect additional scrutiny on siding, window styles, and roofing materials.
Energy codes have tightened. New additions and gut rehabs must meet current energy codes, which may require higher insulation levels, air sealing testing (blower door), and high-efficiency HVAC. Some jurisdictions offer rebates for exceeding code minimums, check with your utility provider.
Inspections occur at key milestones: footing/foundation, framing, rough-in (electrical/plumbing/HVAC), insulation, and final. Schedule inspections in advance: delays can stall your contractor and inflate costs.
Hiring a licensed contractor simplifies permitting, they pull permits and coordinate inspections as part of the job. DIYers can pull owner-builder permits but assume full responsibility for code compliance and inspection scheduling.
If your project involves structural modifications or complex systems, consider hiring a structural engineer or architect. Their stamped plans expedite permit approval and reduce the risk of mid-project code violations.