Home theater 3D projectors are making a comeback, and this time, they’re worth the investment. With improved brightness, resolution, and affordability, today’s 3D projectors deliver an immersive viewing experience that rivals commercial theaters. Whether you’re a movie enthusiast looking to recreate the cinema at home or a DIYer ready to upgrade your entertainment setup, understanding the technology, installation requirements, and key features will help you make a smart choice. This guide walks through everything from how 3D projection works to avoiding common setup mistakes that can derail your project.
Table of Contents
ToggleKey Takeaways
- A home theater 3D projector uses active shutter or passive polarized technology to create depth perception, with active systems offering better brightness and color but requiring pricier synchronized glasses.
- 3D projectors deliver immersive viewing that surpasses flat screens, especially on 100+ inch displays, while maintaining excellent 2D performance with 4K resolution and HDR support.
- When choosing a 3D projector, prioritize native resolution and brightness over marketing specs—expect 1,500-2,000 lumens for dark rooms and 2,500-3,500 lumens for multi-purpose spaces, accounting for 30-50% brightness loss in 3D mode.
- Mid-range 3D projectors ($1,200-2,500) offer the best value with 4K resolution, laser-LED light sources lasting 10,000+ hours, and flexible lens shift for easier installation.
- Common installation mistakes—incorrect throw distance calculations, wrong screen materials, poor cable management, and inadequate ventilation—are preventable with proper planning and manufacturer guidance.
What Is a Home Theater 3D Projector and How Does It Work?
A 3D projector uses specialized technology to display two slightly offset images, one for each eye, that your brain merges into a single three-dimensional image. Most home theater 3D projectors rely on DLP (Digital Light Processing) technology with active shutter glasses or passive polarized systems.
Active shutter systems sync battery-powered glasses with the projector, alternating left and right eye images at high speed (typically 120Hz or 144Hz). The glasses darken each lens in sequence, ensuring each eye sees only its designated frame. This method works with most screen types but requires compatible glasses, usually sold separately.
Passive polarized systems use circular or linear polarization filters and inexpensive disposable glasses, the same type used in commercial theaters. But, they require a special silver or metallic screen to maintain polarization, adding to installation costs.
Most 3D projectors also function as excellent 2D units, supporting 4K resolution, HDR10, and wide color gamuts. They accept 3D input via HDMI from Blu-ray players, gaming consoles, or streaming devices that support 3D content. Be aware: streaming 3D content is limited in 2026, so physical media remains the primary source.
The projector’s onboard processor detects the 3D signal format, side-by-side, top-and-bottom, or frame-sequential, and adjusts output accordingly. Proper setup requires matching the projector’s 3D mode to your source format, or you’ll see a blurry, doubled image.
Key Benefits of Adding a 3D Projector to Your Home Theater
A 3D projector transforms your space into a multipurpose entertainment hub. Here’s what makes them worth considering:
Immersive viewing experience. 3D projection adds depth and realism that flat screens can’t match, especially for action films, nature documentaries, and animated features. The effect is more pronounced on larger screen sizes, 100 inches or more.
Screen size flexibility. Unlike TVs, projectors scale easily from 80 to 150 inches diagonal without significant cost increases. You’re buying the projector once: screen size is determined by throw distance and room dimensions.
Dual functionality. Every 3D projector doubles as a high-quality 2D unit. You’re not sacrificing everyday viewing performance for occasional 3D use. Modern units from projector manufacturers offer 4K resolution, HDR support, and brightness levels suitable for rooms with ambient light.
Gaming advantages. Many 3D projectors support 3D gaming from PC or console sources. Input lag on newer models has dropped to 16-30ms in game mode, making them viable for competitive play.
Future-proofing. While 3D content production has slowed, the existing library of 3D Blu-rays remains available. A capable projector ensures you can enjoy that content for years, and you won’t lose out on 2D performance as streaming and gaming evolve.
Essential Features to Look for When Choosing a 3D Projector
Not all 3D projectors are created equal. Here’s what separates usable units from frustrating ones:
Native resolution. Look for true 4K (3840 × 2160) or 1080p native resolution. Avoid “4K-enhanced” or “supports 4K input” marketing, that usually means a 1080p chip with pixel shifting. Native resolution determines actual image sharpness.
3D technology type. DLP projectors with active shutter typically offer better brightness and color accuracy than passive systems, but require pricier glasses. LCD and LCoS projectors may use passive 3D but are less common in the home theater market. Check what glasses are included or factor $50-150 per pair into your budget.
Throw ratio and lens shift. Throw ratio determines how far the projector sits from the screen. A 1.5:1 ratio means the projector sits 15 feet back for a 10-foot-wide image. Lens shift, vertical or horizontal, lets you adjust image position without tilting the unit, which causes keystone distortion. This is critical for ceiling mounts where exact placement isn’t always possible.
HDMI version. HDMI 2.0 or newer is required for 4K at 60Hz with HDR. HDMI 2.1 adds 120Hz support for high-refresh gaming. Confirm the projector has at least two HDMI inputs if you’re connecting multiple sources.
Lamp vs. laser light source. Traditional lamps last 3,000-5,000 hours and cost $150-300 to replace. Laser and LED light sources last 20,000+ hours with no replacement, but increase upfront cost by $500-1,500. For heavy users, laser pays off within three years.
Resolution and Brightness Requirements
Brightness is measured in ANSI lumens. For a dedicated, light-controlled theater room, 1,500-2,000 lumens suffices for screens up to 120 inches. Multi-purpose rooms with windows or ambient light need 2,500-3,500 lumens to maintain image quality.
3D projection inherently reduces perceived brightness, active shutter glasses cut brightness by roughly 50%, and passive systems lose 30-40% depending on screen efficiency. If a projector rates 2,000 lumens in 2D, expect around 1,000 lumens in 3D mode with active glasses. Size your projector accordingly.
Contrast ratio matters more than raw lumens for dark scenes. Look for native contrast of at least 10,000:1. Dynamic contrast specs are marketing fluff, manufacturers game those numbers with aggressive lamp dimming.
Match resolution to your content. If you’re primarily watching 3D Blu-rays (most are 1080p), a native 1080p projector at 2,500 lumens outperforms a dim 4K unit at 1,500 lumens. For mixed 2D/3D use with 4K streaming, prioritize 4K resolution.
Setting Up Your 3D Projector: Room Considerations and Installation Tips
Successful 3D projection depends as much on room setup as the projector itself.
Screen selection. For active shutter systems, any matte white screen works, fixed-frame screens stay flat and improve image quality over pull-down types. Passive systems require a silver or high-gain polarization-preserving screen, which can cost $400-800 for a 120-inch size.
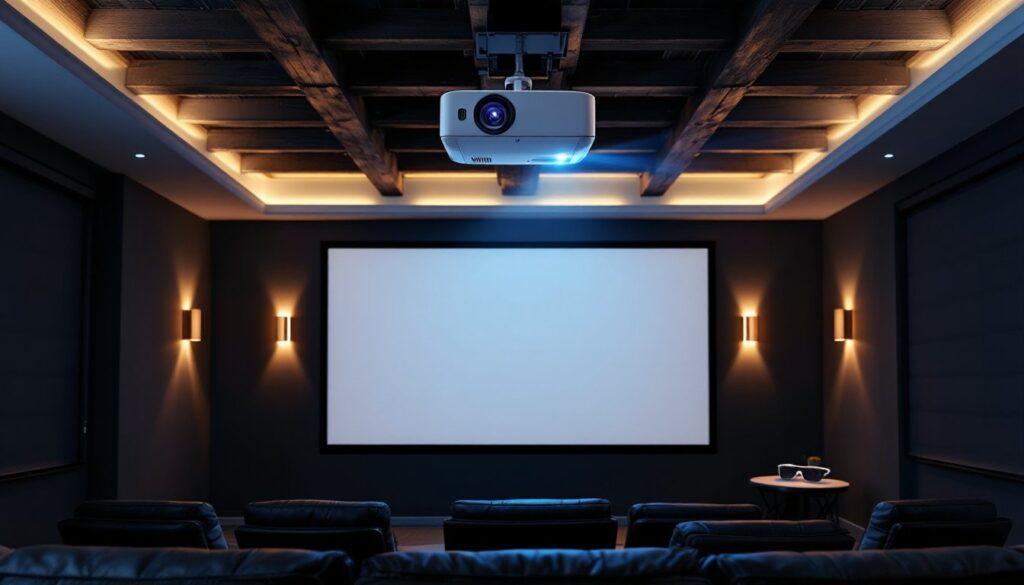
Mounting location. Ceiling mounts provide the cleanest install but require running power and HDMI lines through walls or conduit. Measure throw distance carefully, most projectors include a throw calculator in the manual or on the manufacturer’s site. Leave 6-12 inches of clearance around the projector for ventilation. Blocked vents lead to overheating and lamp failure.
Room lighting control. Even high-lumen projectors benefit from light control. Blackout curtains or cellular shades are a $100-300 investment that dramatically improves contrast and color saturation. Paint the ceiling and walls behind the screen a dark, matte color (charcoal or black) to reduce reflected light.
Seating distance and viewing angles. For 3D, sit 1.5 to 2.5 times the screen width away. Closer exaggerates the 3D effect but may cause eye strain: farther reduces depth perception. Keep seating within 30 degrees of center horizontally, 3D effects degrade at steep angles.
Audio sync. Some active shutter systems introduce slight audio lag. If dialogue doesn’t match lip movement, check your AV receiver for audio delay settings, most allow 50-200ms adjustment.
Safety note: Secure ceiling mounts to joists, not just drywall. A 15-20 lb projector will pull through drywall anchors over time. If you can’t hit a joist, use a mounting plate that spans multiple joists or consult a licensed electrician if running in-wall power per NEC Article 300.
Budget-Friendly vs. Premium 3D Projectors: What’s Worth the Investment?
3D projectors range from $600 entry-level units to $5,000+ flagship models. Here’s how to allocate your budget.
Budget tier ($600-1,200): Expect 1080p native resolution, 2,000-2,500 lumens, and traditional lamp light sources. These work well in dedicated dark rooms for screens up to 100 inches. Most use active shutter 3D. Build quality is plastic, fan noise is noticeable, and lamp replacement every 3-4 years is required. Good starter option if you’re testing the waters.
Mid-range ($1,200-2,500): This is the sweet spot. You’ll get 4K resolution, 2,500-3,000 lumens, lens shift, and better color accuracy. Some models offer hybrid laser-LED light sources with 10,000+ hour lifespans. These handle multi-purpose rooms with moderate ambient light and screens up to 120 inches. Connectivity updates to the latest smart home technology standards, including HDMI 2.1 on newer models.
Premium tier ($2,500+): Laser light sources, 3,500+ lumens, advanced HDR tone mapping, and silent operation. These projectors handle very large screens (150+ inches) and bright rooms without compromise. Build quality is metal, cooling is whisper-quiet, and color calibration rivals commercial cinema equipment. Worth it for dedicated home theaters or if you’re watching 10+ hours weekly.
Where to save: Don’t overpay for built-in speakers, they’re universally poor. Invest savings in a dedicated sound system. Skip motorized lens covers and other luxury features unless they solve a specific need.
Where to spend: Prioritize lumens and native resolution. A brighter 1080p projector outperforms a dim 4K unit for 3D use. Laser light sources pay for themselves if you’re a heavy user. Lens shift is worth $200-300 extra for flexible installation.
Common Mistakes to Avoid When Installing Your Home Theater 3D Projector
Even experienced DIYers hit snags with projector installs. Here’s what to watch for:
Ignoring throw distance math. Measure twice, mount once. Use the manufacturer’s throw calculator to confirm your room dimensions work before buying. A projector with the wrong throw ratio means you can’t fill your screen or it won’t fit in your space.
Skipping screen material research. Passive 3D systems fail with standard white screens. If you’re going passive, budget for a silver screen upfront. For active systems, high-gain screens can introduce hot-spotting, stick with 1.0-1.3 gain matte white.
Poor cable management. HDMI signals degrade over distance. For runs over 15 feet, use active HDMI cables or fiber optic HDMI cables rated for 4K/60Hz. Don’t cheap out, a $15 cable will cause dropouts and handshake issues. Budget $30-60 for quality cables.
Overlooking lamp mode settings. Most projectors offer eco and bright modes. Eco mode extends lamp life by 30-50% with a small brightness reduction, usually imperceptible in dark rooms. Bright mode is for daytime use but shortens lamp life.
Improper ventilation. Projectors pull air from sides or bottom and exhaust hot air out the back or top. Block intake vents and you’ll get thermal shutdowns mid-movie. Leave at least 12 inches of clearance, especially in enclosed ceiling spaces.
Not calibrating 3D settings. Default 3D depth settings are often exaggerated. Most projectors let you adjust 3D effect intensity, start at 50% and adjust to taste. Too much depth causes eye fatigue.
Forgetting glasses compatibility. Active shutter glasses use different sync protocols (DLP-Link, RF, Bluetooth). Confirm your glasses match your projector’s system. Mixing brands often doesn’t work, even though what device reviews might suggest about universal compatibility.
Safety reminder: Wear safety glasses when drilling into ceilings for mounts, drywall dust and debris fall directly into your eyes. Use a stud finder to locate joists: don’t guess. If your mount requires electrical work beyond plugging into an existing outlet, consult a licensed electrician.
A well-planned 3D projector installation delivers years of entertainment without regret. Take time with room measurements, invest in the right accessories, and don’t skip the prep work, that’s where most DIY theater projects succeed or fail.