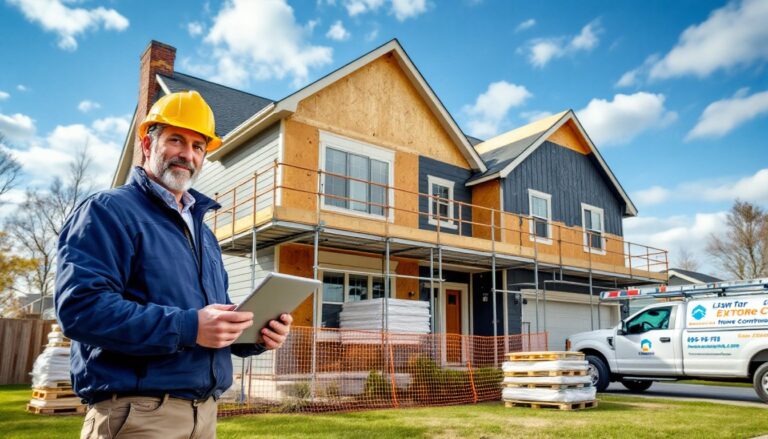
Austin homeowners are transforming spare rooms, basements, and bonus spaces into dedicated entertainment zones that rival commercial cinemas. With the city’s tech-savvy population and growing real estate values, a well-executed home theater isn’t just about Friday night movies, it’s a functional upgrade that adds measurable value to a property. This guide walks through the planning, equipment, installation process, and budgeting required to build a home theater that fits Austin’s unique housing stock and climate challenges. Whether tackling the project solo or hiring local pros, understanding the fundamentals ensures better decisions and fewer costly surprises.
Table of Contents
ToggleKey Takeaways
- Home theater installation in Austin returns 60-75% of costs at resale, especially in tech-forward neighborhoods where AV entertainment spaces are increasingly expected by buyers.
- Proper planning for electrical capacity, HVAC load management, and network infrastructure prevents costly retrofits and ensures your system handles Austin’s extreme heat without performance issues.
- A well-designed home theater installation requires running speaker wire, network cables, and electrical circuits during the rough-in phase before drywall closes walls, making early planning critical.
- Professional installers bring calibrated tools and certifications that justify their 30-50% labor addition by delivering immersive audio calibration and integration that DIY approaches typically cannot match.
- Budget flexibility across three tiers—basic ($8K–$15K), mid-range ($20K–$40K), and high-end ($50K–$100K+)—lets Austin homeowners phase projects or start with core AV equipment and upgrade later.
- Acoustic treatment with 2-inch fiberglass panels on first reflection points costs just $400–$800 but delivers dramatic audio improvements and is essential for satisfying Austin’s noise-conscious shared-wall communities.
Why Austin Homeowners Are Investing in Home Theaters
Austin’s housing market has seen consistent appreciation, making functional home improvements a strategic investment. A dedicated home theater typically returns 60-75% of installation costs at resale, especially in neighborhoods like Circle C, Avery Ranch, and Mueller where home entertainment spaces are increasingly expected by buyers.
The city’s extreme summer heat, often exceeding 100°F for weeks, makes indoor entertainment more appealing than in milder climates. Families spend more time inside from June through September, and a quality home theater provides year-round value. Austin’s tech workforce also skews toward early adopters who prioritize high-quality AV equipment and smart home integration.
Soundproofing considerations matter more in Austin’s mix of single-family homes and townhomes. Newer developments often feature shared walls or smaller lot sizes, making acoustic isolation a practical necessity rather than a luxury. Proper installation addresses these concerns upfront, avoiding neighbor complaints and potential code violations related to noise ordinances.
Planning Your Home Theater Installation: Key Considerations
Start by evaluating electrical capacity. Most home theaters require a dedicated 20-amp circuit to handle amplifiers, projectors, and powered subwoofers without tripping breakers. Older Austin homes, particularly those built before 1990, may need panel upgrades. This requires a licensed electrician and a permit through the City of Austin Development Services Department.
HVAC capacity often gets overlooked. AV equipment generates significant heat: a mid-size theater can add 1,500-2,500 BTUs of heat load. If the existing system can’t handle it, expect discomfort during Austin summers. A ductless mini-split system offers a retrofit-friendly solution without tearing into walls.
Network infrastructure matters for streaming and smart control systems. Run Cat6 or Cat6a ethernet during construction, it’s far easier than retrofitting later. Wi-Fi works for casual use, but serious setups benefit from hardwired connections to eliminate buffering and dropouts.
Choosing the Right Room and Layout
Room dimensions dictate speaker placement and screen size. A 12×16-foot minimum provides adequate space for tiered seating and proper speaker separation. Basements are rare in Austin due to rocky soil and high water tables, so most homeowners convert spare bedrooms, bonus rooms above garages, or repurpose formal dining rooms.
Rectangular rooms work best, avoid square spaces, which create problematic acoustic standing waves. Ceiling height of 8-9 feet accommodates standard projection screens and tiered seating platforms without feeling cramped. Rooms with fewer windows reduce light control challenges, though blackout solutions exist for any space.
Door placement affects sound isolation. A solid-core door with weatherstripping reduces sound transmission by 10-15 decibels compared to hollow-core builders’ doors. Position the entrance away from the screen wall to minimize light spill when someone enters mid-movie.
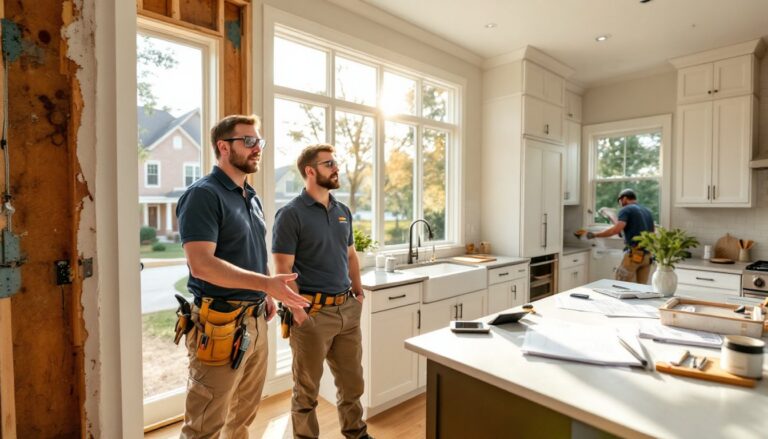
DIY vs. Professional Home Theater Installation in Austin
Competent DIYers can handle equipment mounting, speaker wiring, and basic calibration. This approach works well for rooms under 250 square feet with straightforward layouts and minimal acoustic treatment needs. Expect to invest 40-60 hours for a basic setup: running cables, mounting displays, configuring receivers, and calibrating audio.
Electrical and low-voltage wiring require permits in Austin. Homeowners can pull their own permits, but inspections are mandatory. Running new circuits, relocating panels, or installing recessed lighting legally requires a licensed electrician’s stamp. Budget $800-1,500 for permitted electrical work on a typical theater.
Professional installers from top-rated Austin home theater specialists bring calibrated measurement tools, industry certifications (CTS, HAA, CEDIA), and warranty-backed workmanship. They handle acoustic analysis, equipment integration, and custom control programming that’s beyond most DIY skill sets. Labor typically adds 30-50% to equipment costs but eliminates troubleshooting headaches.
For hybrid approaches, DIYers often tackle demolition, framing, and drywall, then hire pros for AV equipment installation and calibration. This splits savings with expertise where it matters most. Many home improvement projects benefit from this phased approach, and theaters are no exception.
Essential Equipment for Your Austin Home Theater
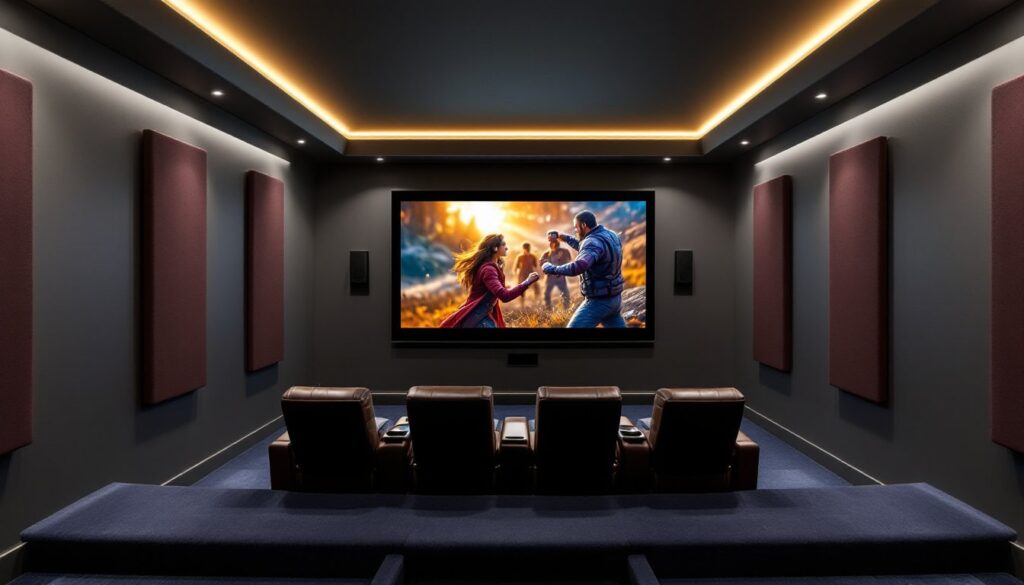
Display options break into two camps: large-format TVs and projection systems. 75-85-inch 4K TVs work well in rooms under 14 feet viewing distance: they handle ambient light better than projectors and require no ongoing bulb replacements. Projectors excel in dedicated dark rooms with 100-120-inch screens, calculate 1.5x screen width as minimum viewing distance.
Audio receivers serve as the system brain. A 7.2-channel AV receiver supports Dolby Atmos and DTS:X with ceiling speakers for immersive audio. Look for models with 100+ watts per channel and modern HDMI 2.1 ports to future-proof for 8K content. Denon, Yamaha, and Marantz offer solid mid-range options.
Speaker configurations start at 5.1 (five speakers, one subwoofer) and scale to 7.2.4 or beyond. In-wall and in-ceiling speakers save floor space and integrate cleanly, ideal for Austin’s open-concept homes. For bass, a powered subwoofer with 12-inch driver handles most rooms: larger spaces may need dual subs to eliminate dead spots.
Acoustic treatment prevents echo and reverb that muddy dialogue. 2-inch thick fiberglass panels on first reflection points (side walls, ceiling) plus bass traps in corners cost $400-800 for materials. This DIY-friendly upgrade delivers dramatic audio improvements, don’t skip it.
Seating ranges from basic recliners to dedicated theater seats with cup holders and USB charging. Allow 36-40 inches width per seat and verify weight ratings for riser platforms. Used commercial theater seats offer surprising value if you don’t mind hunting Facebook Marketplace.
What to Expect: The Home Theater Installation Process
Phase 1: Pre-construction (1-2 weeks). Finalize equipment selections, create wiring diagrams, and pull permits. Order long-lead items like custom acoustic panels and screen frames. This planning phase prevents mid-project delays and change orders.
Phase 2: Rough-in (3-5 days). Run electrical circuits, speaker wire, and network cables before closing walls. Use CL3-rated cable for in-wall speaker runs, it meets fire code. Install outlet boxes for wall-mounted equipment and blocking for screen/speaker mounts. Inspections happen at this stage.
Phase 3: Finish work (4-7 days). Complete drywall, paint, and flooring. Install acoustic treatments, trim out electrical, and mount equipment. Dark matte paint on walls and ceilings reduces reflections: avoid glossy finishes. Carpet or thick area rugs over padding improve acoustics compared to hard flooring.
Phase 4: Equipment installation (2-3 days). Mount display, install speakers, connect components, and dress cables. Professionals use wire looms and cable raceways for clean runs. Test all connections before securing equipment permanently.
Phase 5: Calibration (4-6 hours). Use measurement microphones and software to tune speaker levels, delays, and crossover points. This step separates mediocre systems from exceptional ones. Many receivers include auto-calibration (Audyssey, YPAO, Dirac), but manual tweaking yields better results.
Budgeting for Your Home Theater Project in Austin
Basic setups ($8,000-15,000) include a quality TV, 5.1 sound system, AV receiver, and basic seating in an existing room. This covers equipment, DIY installation, minimal acoustic treatment, and permitted electrical work. Adequate for casual viewers who want better-than-soundbar audio.
Mid-range systems ($20,000-40,000) feature projection, 7.2 audio, custom seating, full acoustic treatment, and professional installation. Includes basic automation (universal remote or tablet control) and dedicated electrical/network infrastructure. This tier delivers true cinematic experience without exotic components.
High-end installations ($50,000-100,000+) incorporate 4K laser projectors, immersive audio (Atmos with ceiling speakers), motorized screens, tiered seating platforms, advanced room treatments, and whole-home automation integration. Often includes dedicated construction, framing new walls, sound isolation, custom lighting control.
Austin-specific cost factors include 10-15% higher labor rates than national averages due to strong local demand. Permits run $50-200 depending on scope. Get multiple quotes and verify licensing, Texas doesn’t require general contractor licensing, but electrical and HVAC work does. Detailed cost estimators for home improvement projects provide local pricing benchmarks.
Financing options range from home equity lines to specialized AV financing through installers. Some homeowners phase installations, starting with core AV equipment, then adding seating and treatments later. This spreads costs while delivering immediate functionality.